Quantcast
Channel: Online Advance Digital signature updates | SigningHub blog
Viewing all 15 articles
Browse latest View live

SigningHub accepts South African AeSign credentials

$
0
0
We are pleased to announce that by working with our South African partner LawTrust we can now bring AeSign credentials to the SigningHub.  AeSign (Accredited Advanced Electronic Signatures) are the only signatures in South Africa which are deemed by law to have been valid and applied correctly by the signatory and are therefore trusted to be equivalent to handwritten signatures. So for the first time, you can now use your digital certificate from the LawTrust AeSign CA directly in SigningHub.  Also any documents signed using such credentials can be verified through SigningHub.  We will continue to ensure our SigningHub service has the widest interoperability with high-trust digital ID providers globally, so look out for further developments in this area.

Liaquat Khan
Technical Director

Fast effective document workflow signing and approval

$
0
0
The iPad is the perfect device for signing documents. It provides a large screen for easily viewing documents and drawing the signature on the touch screen with your finger/stylus is as natural as signing with pen on paper! There are many iPad apps which do this.


But just drawing your e-signature provides no security from copying this image and placing it on other documents. Also the e-signature cannot detect later edits to your documents. What’s different about the SigningHub app is that it overcomes these limitations by also creating advanced, long-term PKI digital signatures which sit behind you hand-drawn e-signatures. Each user has his or her private digital signature PKI key securely managed on the server. The server also keeps a secure detailed audit trail of all signing operations.
 

 With the SigningHub iPad app you can view your pending document and sign in seconds, as well as keeping tracking of your signed documents.


Liaquat Khan
Technical Director


3rd party websites can now leverage the full power of SigningHub

$
0
0
For a while now we have provided a comprehensive web services interface (API) for SigningHub.  This allowed business applications to initiate document signing workflows and create/delete user accounts.  However an issue for many website applications is that they don't want users to register and login separately with the signature service provider.  All the interactions should be through their own website so that there is consistent branding and user experience. To help in this usage scenario we have now added website integration using our REST based interface:


Document Signing

This is similar to the way credit card payments are handled by websites when they use an external payment gateway for the credit card processing. In the above example JBmotors website can automatically create the user accounts on SigningHub and redirect the user for signing purposes.  The SigningHub pages also show the same JBmotors header/footer so the user feels comfortable with that they are in the right place.  Note the address bar in the browser will show SigningHub, but this solution can also be implemented using iframes and widgets so even this aspect is not shown to the user.

For further details check out this page: http://signinghub.com/website-integration.aspx

As a demo we have set up this page as an example 3rd party page, which then calls our SigningHub service: http://signinghub.com/web-integration-demo.aspx


Liaquat Khan
Technical Director

Delegated e-Signing

$
0
0
Often in the real world people are unable to sign documents because they are away on holiday or some other important business. In situations like this there is normally a possibility for some other suitably authorised person to sign on behalf of the original signer. Within SigningHub we have built support for delegated or so called  PP signatures. Set-up is simple, just identify the person who can sign on your behalf and the date range when this is allowed (e.g. whilst you are on leave).

During the configured time period both you and your authorised delegated signer will receive any document signing requests sent to you. Either one of you can view and sign the document and the workflow process will then continue as normal.  

Once the delegated signer opens the document they are guided to the signature field that needs to be signed:


After signing the updated signature appearance is shown:

Once the document is signed the document owner will be notified via email. The owner can also see the details of each signer from the document action history.


It's so simple to set-up and test, why not try it yourself next time.

Liaquat Khan
Technical Director

Ensuring Correct Form Filling

$
0
0
Form filling is an integral part of many business workflow processes. Organizations big or small require their employees, partners or customers to fill forms e.g. account opening forms, signing up to company policy documents, filling in and signing insurance claim forms, completing expenses and holiday requests etc.

Keeping in view the wide use of forms, SigningHub provides the ability for users to fill in form fields before digitally signing.  The form fields should have been created using designer tools such as Adobe® Acrobat® orAscertia PDF Sign&Seal
.  SigningHub supports form fields such as text fields, list boxes, combo boxes, radio buttons, check boxes, initial fields and signature fields.


Note: Keep an eye out, as SigningHub will soon be providing a built-in form designing capability, so that adding form fields is simpler than ever.

Now a common issue when asking users to fill in forms (paper or electronic) is that they may miss out some fields or may even fill in fields which were not intended for them.  To avoid such problems within SigningHub, the document owner can assign existing form fields to particular users.  This means only the identified user can fill in that form field i.e. SigningHub will prevent someone else from filling in that field.  Furthermore SigningHub will also ensure that the correct user has filled in the field before being allowed to sign and complete the approval process.

When a document is first opened which contained form fields, the document owner will see “assign to” drop down menu like shown below:


Clicking this allows the document owner to select who is required to sign it:


This list will show all the users who are part of the current workflow.  If it’s empty just add some signers from the top right area.

To make the field mandatory simply select the “make field mandatory” option. Once done the colour of the field changes to indicate it is mandatory and also on mouse-hover SigningHub will show the identity of the person who must complete this field:


To clear the field assignment, click on the redcross icon. Note that the document owner can also assign a field to a usergroup which allows the field to be filled-in by any member of the user group. This can be very useful where there are a number of managers for example and anyone of them can complete certain fields.

Similarly like the text field, the document owner can assign any other form fields and also set default values. E.g. to set a date/time field the document owner can simply click on the field which shows a date/time selection box:


Initials fields can also be added by licking the button shown below:


Clicking shows the list of users who are already added in the list of selected signers:


Initials fields are displayed as follows and must be completed by the relevant person before signing:


Once all the relevant form fields have been assigned to users, simply send the document out by pressing the “send” button:


Now users will only be able to fill in the fields which are assigned to them and the system will prevent the user completing the process until all the fields are filled in. Thereby preventing mistakes and incomplete forms to be returned.

The next blog will explain how the form fields will be displayed to users and how they will be guided through the form completion and signing process.  Stay tuned…and until then happy collaboration!

Liaquat Khan
Technical Director

SigningHub introduces Navigations Tabs

$
0
0
The latest release of SigningHub provides a very handy way to guide users on the form fields they are required to complete before signing the document. This is achieved through the use of navigation tooltips guiding the user in a step-by-step fashion.

This navigation tab is shown on the left side of the opened document when a user opens one of their pending documents as shown below:


On clicking Start the user is taken to the first field that must be filled-in by the currently logged in user:


The relevant field is highlighted in a clearly visible blue border. Optional form fields are represented with thin black border as shown below:


Once completed, by clicking the tab again the user is taken to the next form field assigned to them:


This continues until all mandatory form fields (including initials) are processed. The Navigation tab will not guide you to any optional form fields in the document. Once all mandatory form fields are filled upon clicking the tab again the user is taken to the page where they must apply their digital signature:


If the user tries to sign before completing the entire mandatory form field then an appropriate error is shown:


Once all mandatory fields are filled, clicking the signature field shows the normal signing dialog:


Once the document is signed then the navigation tab text changes to Finished:


Clicking Finished takes the user back to the MyDesk showing the updated document status i.e. Signed:


So as you can see with our navigation tab it’s easy to ensure that users complete all the relevant form fields assigned to them.  Nothing can be missed by accident as the user cannot sign and complete the process until all mandatory fields are completed.   Imagine the time and effort this will save because of incorrectly or partially completed forms in your organisation.


To learn how to add form fields and assign these to particular users in the workflow see our earlier blog post: Ensuring Correct Form Filling

Liaquat Khan
Technical Director

Strong Authentication using SSL/TLS Client Certificates

$
0
0

We have recently added a strong user authentication method into SigningHub that uses X.509 SSL/TLS client authentication certificates. This feature is only available to on-premise installations of SigningHub.

This provides a more secure alternative to passwords as these can be subjected to brute force attacks. Not only is SSL client authentication more secure but it can also mean that users can login without providing passwords which makes life easier. To learn more about SSL/TLS client authentication click here .
Note: SigningHub already uses SSL/TLS security but only with server authentication certificates, where users are authenticated using username/passwords. The communication link between the browser and server is secured using strong encryption as used by many banking sites. Our SSL/TLS server authentication certificate is also trusted in almost all publically known browsers.

How to configure

After installing Ascertia Docs (the product which powers SigningHub), enable SSL/TLS client and server authentication by configuring the following tags inside the adocs.config file (see highlighted items):


Use Interface

Once configured the Register and Login pages work differently. Before login you need to register with your SSL/TLS client certificate. Accessing the registration page shows the following screen:


As you can see the registration page is different as now you cannot edit your email address (this is taken directly from your SSL/TLS client certificate) and there are no password fields as well. Once registered successfully, user gets an activation email as normal and on activating is show the welcome screen.


If your SSL/TLS authentication certificate is about to expire (every digital certificate has a validity period normally 1 year) a warning message is shown at login time, suggesting to re-register with a newly issued certificate.


The administrator can configure how many days before imminent expiry should these alerts are shown to the user. Once your SSL/TLS client certificate is expired, it can no longer be used. You can however register a new certificate that has been issued to you by your administrator.

For further details on have SigningHub installed in house contact us and we will be happy to provide the full product on a free trial basis.

It’s that simple. Happy signing!

Liaquat Khan
Technical Director

Real-World Use Case: Group/Departmental Level Signing

$
0
0
In the real-world often it doesn't matter who signs a document but rather do they have the sufficient authority to do this. That is the "identity" of the signer is not as important as the "authorisation". E.g. a Purchase Order typically requires an authorised member from the Procurement department to sign-off on it.

Now there may be several people working in the Procurement dept who have sign-off authority, and who actually signs the PO is not as important as long as it's an authorised member of the Procurement dept.
SigningHub supports this real-world use case through the concept of "group signing". Groups can be set-up to reflect department members who are authorised to sign-off on particular type of documents. The document owner can then send the document for approval to one of these pre-defined groups depending on the type of document (this can be configured as part of the workflow template). Once shared all members of the group can see the document, and any member of this group can sign-off on the document. The signed document is visible to all members of the group and remains in their My Desk area. This helps to ensure documents are signed quickly and business doesn't stop just because some members of the group are unavailable.
The following example shows how this works with an example of a Budget Approval request. First the user uploads a Budget Approval request document:
From the My Desk area the user, selects "Add Signers":
Then the user selects the 'Acme Directors' as the group:
Once the "group" is added as the signer, the user prepares the document in the normal way (i.e. to place the signature field where the digital signature appearance needs to be stamped on the document):
The user drags the signature field to the correct position and then presses "Send" button to start the workflow process:
This document is now sent to all of directors which are in the 'Acme Directors' group. A notification email is sent to each of the director. When any one of director logs in they can see the document pending their signature:
Opening the document allows the group member to review the sent document and then sign it off. Clicking on the navigation tab takes the user to the signature field.
Clicking on the signature field OR the Sign button at the top right shows the signing dialog:
Once signed, clicking on the signature appearance shows more details about the digital signature:
The My Desk area is updated with the new document status i.e. "Signed":
Note that once any member of the group has signed the document, the workflow can proceed in normal way e.g. their could be further signers (either individual signer or further group signers). In this way group signing can be chained e.g. signatures on a document from multiple different departments/groups and interleaved with individual signers.


I hope you will enjoy this feature. Happy signing!


Liaquat Khan
Technical Director

SigningHub New Feature: E-Signatures

$
0
0
SigningHub currently enables users to create a combined e-signature with a digital signature. The e-signature part is the hand-signature image displayed on the document, whilst the advanced PKI digital signature is the part that is embedded into the PDF document and is verifiable upon clicking the signature appearance.

Users can create their e-signature in these ways:
  • Dynamic drawing - using a finger, stylus or a mouse
  • Using a scanned image - uploaded and/or stored
  • Typing their name - using a script font
The digital signature is created using one of these ways:
  • Server-side signing (the user’s own key is held securely on the server)
  • Local signing (the user’s key is on a smartcard or secure USB token)
  • Mobile signing (the user’s key is held securely on a mobile device)
The advantage of tying the e-signature together with a digital signature is that although an e-signature image provides people with instinctive recognition, it offers no security. That is, (a) the e-signature can be lifted from one document and added to another, and (b) the document can be later edited and changed without detection. These threats are countered by linking each
e-signature with an advanced PKI digital signature.

In some scenarios however an e-signature on its own makes practical sense. Typically this is in situations where a person needs to sign a document as a one-off immediate action, without the need for registration (since the user will not be performing regular signing actions it’s not appropriate for them to hold an account on the system). Also generally in such scenarios there will be a registered user later in the workflow who will apply their digital signature to protect the document from change. It is for this reason we are releasing an e-signature only option (available from Oct 2013).
This brief note describes how to create workflows with the new e-signature only functionality.
Step 1: Preparing for an e-signature
First login to SigningHub and upload a document as normal. Add a signer as usual and proceed to the document preparation window. You will see the blank signature field as follows:
The blue “D” icon indicates that this is a digital signature field (as explained above an e-signature image will also be added to this). By clicking the cog icon in the top right corner, you can switch this to an e-signature only field:
Blank e-signature fields are shown as follows (the blue “E” means e-signature):
Step 2: Applying an e-signature
Once workflow is initiated a notification email is sent to the user in the normal way. The user simply clicks on the hyperlink in the email notification and is shown the document directly. There is no need to login to SigningHub, since this is an unregistered user. They can review the document and sign by clicking on their e-signature field. This will show the following window:
The user can create their e-signature as discussed earlier. The user is not prompted for a password because they are a one-time user without an active account.
Once the e-signature is created the workflow process continues to the next signer as before. Typically the next signer should be a “digital signer” – their digital signature protects the whole document from subsequent unauthorised changes.
Summary
E-signing provides a simple way for the anyone to sign documents without having to register with SigningHub. The person can just click on the link provided in the notification email, view the document and then sign the e-signature field reserved for them and not anywhere else.
A workflow may contain any number of e-signers and digital signers, in any order. A user registered on SigningHub who normally creates digital signatures, can also create e-signatures – this is controlled by the document’s workflow settings.
The e-signature features are also available via the web services API to support use cases when SigningHub is tightly integrated with another website.
SigningHub provides the most powerful on-line signing by providing options for:
  • E-signing only
  • E-signing with a witness (notary) digital signature
  • E-signing with a user’s own unique server-side digital signature
  • E-signing with a user’s own unique local digital signature
  • E-signing with a user’s own mobile digital signature
Contact us to discuss how these options can best be deployed in your business.
Note: the SigningHub apps for iOS and Android will support the e-signing functionality from December 2013 onwards.
Liaquat Khan
Technical Director

Electronic Signatures versus Digital Signatures & what’s supported by SigningHub?

$
0
0

Overview

Electronic signatures and digital signatures are two terms that are commonly used to mean the same thing. Even within the security industry often marketing people tend to use the two terms interchangeably. However this is incorrect as within the technical and legal communities the two terms have very different meanings. When choosing a signing solution it’s very important to know exactly what is being offered.

Here we try to clear up the confusion by explaining the main differences between electronic signatures and digital signatures and describe their relative pros/cons. We also link the theory to what is actually implemented in practise in SigningHub. Read on and you are bound to be impressed with all the different types of signatures supported by SigningHub!

Understanding e-signatures and digital signatures:

Firstly let’s clarify what are the generally accepted meaning of the terms e-signatures and digital signatures:

  • Electronic signature: This is any signature that is in electronic form, i.e. as opposed to paper-based ink signatures. Examples of electronic signatures include: a scanned image of the person ink signature, a mouse squiggle on a screen or a hand-signature created on a tablet using your finger or stylus, a signature at the bottom of your email, a typed name, a biometric hand-signature signed on a specialist signing hardware device, a video signature, a voice signature, a click in an “I Agree” checkbox, etc. The list is actually endless. The main point is that an e-sign is any “mark” made by the person to confirm their approval of the document or transaction.
  • Digital Signatures: These are actually a subset of electronic signatures because they are also in electronic form. However digital signatures go much further in terms of providing security and trust services:
    • Signer authentication: i.e. proof of who actually signed the document. i.e. digital signatures linking the user’s signature to an actual identifiable entity.
    • Data integrity: i.e. proof that the document has not been changed since signing. The digital signature depends on every binary bit of the document and therefore can’t be re-attached to any other document.
    • Non-repudiation: i.e. the signer should not be able to falsely deny having signed their signature. That is, it should be possible to prove in a court that the signer in fact created the signature.

Digital signatures are created using cryptographic techniques, normally based on PKI systems, where the private signing key is only accessible to the owner. There are many different ways of implementing digital signatures, each offering different levels of security and trust for the above services. Some of these different approaches for implementing digital signatures are described later.

This leads to some interesting points:

  1. A digital signature can also be considered an e-signature, but the reverse is not true i.e., not all e-sign offer the same security services as digital signatures .g. consider a basic e-signature like a scanned signature image inserted into a document – this can be easily copied from one document to another by anyone. Also the document can be easily edited after inserting the signature image.
  2. Any mark on a document can capture the intent of the signer to “approve” the contents, i.e. this mark doesn’t necessarily need to look like the person’s hand-signature. Even a simple “X” is sufficient to show the signer’s intent. The issue is in terms of proving who could have made this mark.
  3. To avoid later claims by the person that didn’t know what they were signing, it’s important to be able to show a legal notice to the user which they must confirm so that their signing action can be considered a wilful act.

The following table summarises the main pros/cons of each type of signature:

ProsCons
Electronic Signatures
  • Provides better user experience as reflects normal ink signatures when using graphical images
  • Can be easily copied from one document to another
  • Document can be changed easily after signing without detection
  • Unclear who actually signed the document, so signatures can be repudiated
  • Not automatic equivalence to hand-written signatures in most jurisdictions
Digital Signatures
  • Signed document can’t be changed even by a single bit without detection
  • Who has signed the document can be determined with a high degree of trust
  • Signers can’t easily repudiate their signatures
  • Digital Signatures can have equivalence with hand-written signatures in a court
  • Based on cryptographic codes and not easily to associate with normal ink signatures for human users

Although digital signatures have most of the benefits in terms of security and trust, to create the best user experience it’s necessary to merge the concept of electronic signatures with digital signatures – and that’s exactly what we have done in SigningHub!

Find out which signature types are implemented in SigningHub

Liaquat Khan
Technical Director

Which signature types are implemented in SigningHub?

$
0
0

Overview

In an earlier blog article, we explained the differences between e-signatures and digital signatures. Click here to read this article. In the current blog we cover the different ways of creating e-signatures and digital signatures in Signinghub

SigningHub is a very powerful and flexible solution that caters for many different business scenarios, each with different trade-offs between security, ease of use, ease of management and costs. The following list shows the different types of signatures supported by SigningHub with increasing levels of security:

  1. E-Signature only SigningHub supports for creating your e-signature. Note most cloud signature service providers only offer e-signing. Here is an example of an e-signed document:
  2. E-Signature + a notary digital signature, i.e. the user just creates their electronic signature mark, but then a server-side digital signature is applied to lock the document from further edits. Some of our competitors have reach this level. Here is an example such a signature:
  3. E-Signature + user’s own digital signature. This the best solution from a trust perspective because each user’s digital signature is created with a unique PKI keys owned by the user. No company can compete with SigningHub at this level. Here is an example document signed with the users own e-sign and digital signature:

What is unique about SigningHub is that it can manage each user’s digital signing key securely at various levels of security and trustworthiness:

  1. Each user’s key is stored in encrypted form in the SigningHub server database. The user is authenticated before signing using:
    1. Simple passwords, and/or
    2. Using One-Time-Password (OTP) sent to the user’s registered mobile phone. Other OTP techniques like grid systems can also be supported.
  2. As above, but each user’s signing key is stored in a secure tamper-resistant FIPS-compliant HSM rather than encrypted database. The user’s key never leaves the HSM, i.e. the user’s signature is created inside the HSM.
  3. User’s signing key is held on a secure smartcard or USB token. These hardware tokens are generally compliant with FIPS or Common Criteria or other Secure Signature Creation Device (SSCD) requirements. An example is the Adobe® CDS tokens available from a number of our CA partners, like GlobalSign, Entrust, LawTrust and QuoVadis
  4. User’s signing key is held on their mobile device. The key can be held within the mobile app, or on a secure microSD card, SIM, or via an attached smartcard.

The “e-signature only” option as explained above is not recommended because it offers no security, however it can be useful for quickly getting a person’s signature without them having to register with SigningHub – hence it does have practical uses. However this should only be done when a second signer will be adding a digital signature afterwards (i.e. using one of the other methods mentioned above), this will lock the first user’s e-signature so that any subsequent modifications are easily detected.

Options for creating an electronic signature

As explained, SigningHub allows users to either create an electronic signature on its own or as part of a digital signature. In both cases users can e-sign using any of the following means:

e-signing using finger /stylus on a mobile device:

e-signing using mouse drawing:

e-signing by just typing your name:

e-signing by uploading scanned signature image:

e-signing using a specialist signature device:

Note: We support Signotec and Wacom signature tablets

Some countries do store the user’s hand-signature image on their eID cards, as such SigningHub can be taught to use this image as the e-sign.

Options for creating a digital signature

As explained above user’s can create their digital signature using keys held centrally on the server (encrypted database or HSM), or keys held locally on a smartcard or secure USB token, or keys held inside their mobile device. Further to this, SigningHub supports the following different types of signatures:

  • Basic digital signatures: This is the simplest form of a digital signature and is generally not recommended by us as they can’t be verified in the long-term.
  • Long-term digital signature: These are signatures with embedded timestamps to prove the time of signing and also embedded signer’s certificate status information to prove that the signer’s keys/certificates were valid at the time of signing. Such signatures can then be verified many years into the future (e.g. at least 10+ years). We support the following type of long-term signatures in SigningHub:
    • PAdES Part 2 (ISO 32000-1)
    • PAdES Part 4 (both LTV and PAdES-A signatures)
    Native support for Microsoft Office 2013 documents (i.e. XAdES signature format) is coming soon.
  • Adobe CDS and AATL signatures: In order to get your signatures automatically trusted in Adobe Reader, it’s important to use a signing key/certificate which has been issued by Certificate Authority (CA) authorised by Adobe through its CDS or AATL programs. SigningHub supports this by allowing the use of certificates from such trusted external CAs.
  • EU Qualified signatures: In order to create an EU qualified signature certain prerequisites must be met, e.g. the signer’s certificate must follow a particular certificate profile and be issued by a qualified CA, furthermore the signature must be created inside a compliant secure signature creation device (SSCD). SigningHub supports the use of qualified certificates issued by Qualified CAs and the use of trusted SSCDs, therefore SigningHub can create EU qualified signatures. Such signatures have automatic equivalence to hand-written signatures in a court of law.

Conclusions

We have all the bases covered in SigningHub. We support e-signatures only option but recommend using these together with digital signatures. We allow multiple ways of e-signing on multiple devices. In terms of digital signatures we allow multiple options for user’s signing key security, i.e. server, smartcard, secure USB token, mobile. We also support long-term signatures which can be verified in the future. We support Adobe CDS signatures and also EU qualified signatures. In addition to this the SigningHub core document workflow, tracking and notifications help to ensure your approval workflows are efficient and easy to manage.

Liaquat Khan
Technical Director

SigningHub New Feature: In-Person Signing

$
0
0

Overview

The SigningHub “in-person signing” feature is a new capability that enables a person to electronically sign documents without requiring them:

  • To have an account on SigningHub
  • To have an email address
  • To have their own computer

In-person signing suits many business environments where members of the public need to electronically sign a document or form in front of a member of staff that witnesses this by signing with their digital signature.

The in-person signer creates a basic e-signature, i.e. a hand-signature image, on the document that records their intent or approval of the document content. The document and the e-signature is then locked to prevent further changes by the witness digital signature that is applied by the host of this face-to-face meeting.

This brief note describes the process.

Step 1: Preparing for In-Person Signing

First login and upload a document as normal. Add yourself as signer and then proceed to the document prepare window. Position your digital signature field in the required location as normal.

From within the advanced settings area select the “In-person signing” option:

This will show a pop-up window, where you can select the number of e-signature fields you want to add per host signer, an optional identifier for these fields and the page number on which they should be located:

When you click the “Add” button the in-person signing field is created on the document. The field is clearly marked to show that it is an in-person signing field:

Also the right-hand navigation panel shows the in-person signing field:

The document is now prepared. To save a template of all these settings click the “save template” button in the above screen. This enables you to automate the process the next time you need to create in-person field(s) on a similar document.

Step 2: In-person Signing Step

To start the workflow approval process you need to simply send the document. To initiate the in-person signing process sometime later, simply login to SigningHub and select the document to be signed in the pending folder OR click the hyperlink in the email notification.

The easy to use navigation tab immediately identifies the next action that needs to be completed before you can digitally sign and witness the e-signature:

At this stage simply pass your laptop, notebook, iPad or Android tablet to the customer (the in-person signer). If this was a PDF form, then the navigation tabs would guide the person to fill in the mandatory form fields in the prescribed order before proceeding to their e-signature field.

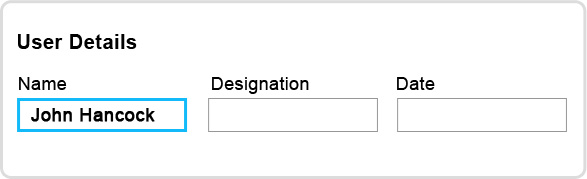
To e-sign they should click on their in-person field and the following window will be displayed:

This looks like the normal SigningHub digital signature window, except there is no requirement to enter an account password (since the in-person signer does not have an account on SigningHub).

Once the e-signature has been created, the e-signature image is inserted into the document and the digital signature field now becomes active waiting for the host’s digital signature:

As the witnessing host, you can then digitally sign in the normal way (e.g. using server-side signing, local smartcard/USB token signing or a mobile signature).

The completed document will look as follows:

A signed copy of the document can be provided to the in-person signer at this stage.

Summary

In-person signing provides a simple way for customers, citizens or anyone else to sign documents during face-to-face meetings, without requiring an account on SigningHub. The document and the person’s e-signature is witnessed and protected from unauthorised change by the digital signature applied by the host to complete the process.

The process discussed above is just one example. A document or form can have:

  • Multiple in-person signing fields all e-signed by the same person
  • Multiple in-person signing fields, e-signed by different people during the same session
  • Multiple in-person signing fields which are hosted and witnessed by different people (digital signers) during the workflow process

This flexibility ensures that the in-person signing functionality is useful for almost any business scenario.

Liaquat Khan
Technical Director

SigningHub is not affected by the HeartBleed OpenSSL vulnerability!

$
0
0
OpenSSL is one of the most commonly used toolkits to implement PKI services. It is free/open source, regularly updated and comes bundled with Linux. You can also install its binaries on Windows. Although issues in the SSL protocol have been identified in the past, this time most OpenSSL implementations have a critical vulnerability.
Researchers in Codenomicon and Google found the vulnerability inside the OpenSSL implementation code, see this link for more details: CVE-2014-0160. Once exploited, a threat agent can access sensitive information which includes passwords and secure key information. OpenSSL has recently provided a patch to address this vulnerability.

As a responsible vendor in the e-signature and digital signature space Ascertia knows the importance of alleviating client concerns about our products and services. Although this issue is causing huge waves in security circles, SigningHub.com users are unaffected. SigningHub does not use OpenSSL code and is therefore unaffected by this vulnerability. Consequently there has been no down-time or patching, users do not need to change their SigningHub passwords or worry about the privacy of their documents! This includes both the SigningHub website and the SigningHub mobile apps (iOS and Android).

For high security SigningHub uses the most advanced and secure EV SSL certificates that follow the requirements published by the CAB Forum (a forum of major browser vendors to ensure a secure browsing experience). You can observe this by looking at the green bar shown in a browser which shows that an EV SSL digital certificate was issued to the identified vendor.


Digitally Sign multiple documents using 'Bulk Sign' feature

$
0
0
Bulk signing is a powerful feature of SigningHub which allows users to digitally sign multiple documents in one go thus saving substantial time in opening the document and signing them one by one. This feature works both when you are using either a local (client-side) signing keys OR server side signing keys.

To initiate bulk signing, a user can simply select the list of documents from My Desk and click the Bulk Sign button: 

The bulk signing screen shows the list of documents you have earlier selected for signing.
If the document can be signed then the Status column will show ‘Ready to sign’. If user has selected a document which can’t be signed for any reason then a warning icon with reason is shown:


If there is a legal notice associated with a document then the user has to select ‘I agree’ check box to otherwise the document will not be signed. User can also view the legal notice by clicking the View button. If a document is selected mistakenly then it can be removed from the list:


Once user is ready, he needs to click the Sign now button which shows the signing dialog:

Once user has filled in the required information and click the Sign button, the document signing process starts and user is now shown the real time status of each document as they get signed:

Once all documents are signed, user can close the screen using the right cross button or view the signed documents by clicking the View button.

As you can see, SigningHub makes bulk signing simple and intuitive. This feature is one of its kind (to date there is no similar digital signature product which allows bulk signing) and is designed to save your time by introducing an automated way to digitally sign your document.

Enjoy Bulk Signing and let us know your signing experience!.

SigningHub patched to prevent the SChannel (CVE-2014-6321) vulnerability

$
0
0

A security advisory was published on 11th November 2014 by Microsoft, describing a security threat that may allow arbitrary code execution by hackers. This vulnerability could allow remote code execution, if an attacker sends carefully crafted packets to a Windows server. This issue lies within Microsoft's SChannel implementation, and has been rated as "Critical" by Microsoft, for all the supported releases of Microsoft Windows.

SigningHub runs on a Windows 2012 Server and therefore the official patch has been applied to remove this vulnerability. Anyone running an on-premise instance of SigningHub Enterprise (also called Ascertia Docs until recently) must also apply these fixes see details.

Viewing all 15 articles
Browse latest View live